
RockyTop Part I. Hardening Our Home
We learned at the Fire Safe Council meetings that the most important things about hardening a home against wildfire are:
- Remove flammable things at least 5 feet away from your home,
- Prevent flying embers from entering your home, and
- Keep your roof and yard free of leaves and anything else flammable.
1. Remove Flammables Close to the House
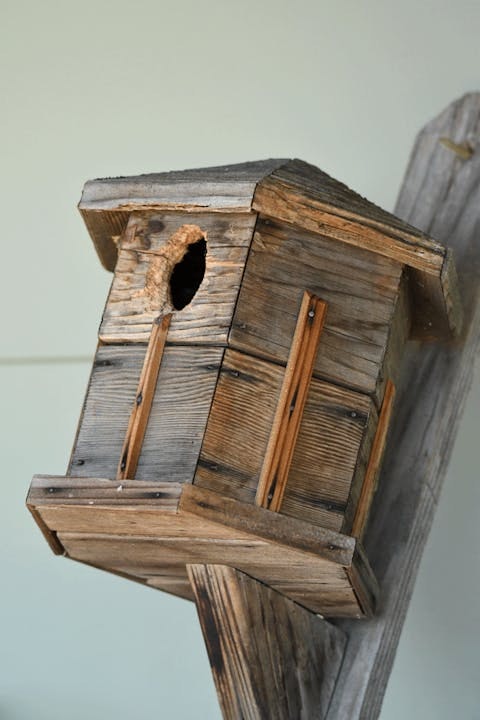
We removed anything made of wood or other flammable material including a charming little birdhouse Lara made. Why? Just imagine all the burning embers blowing toward our house and some going right inside the bird house where birds have built a wondrous dry nest of twigs. Get the picture? We hung the birdhouse in a tree where we could see it from the kitchen window -- much better!
We removed some hedges and a few small trees that were pressed tight against the house. But the most difficult decision was to remove two, large, Blue Oaks -- one growing through our deck and the other overhanging 1/3 of the house. We realized that we could not kid ourselves any longer. The trees had to go for our home to be fire safe.
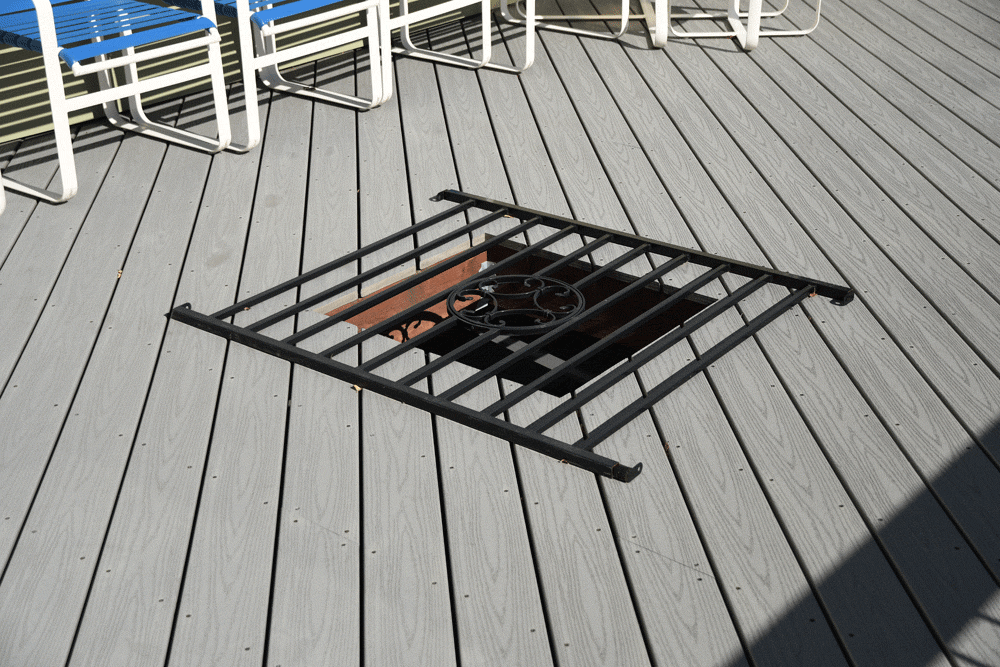
In the photo, you see the hole left in the deck after we removed one of the Blue Oaks. We will have to patch the deck planking or, better yet, we may place some plexiglass over the hole. That way, light goes through the deck onto a shade garden beneath it that does not get enough light. But, still, that leaves our deck with no shade. We are looking into some awnings.

The second Blue Oak was a magnificent monster! We built a retaining wall around its base which now looks starkly empty. But we are going to get a Liquid Amber and put it close to where the Blue Oak used to be. Liquid Ambers tend to grow straight up and we can keep it trimmed that way. What looks stark right now will soon be filled with luxurious green in the summer and flaming red and orange in the fall!
2. Prevent Embers from Entering Your Home
We invited two companies to give us bids on replacing the gable, eave, roof, and foundation vents with Vulcan Vents (there are three approved vent companies -- check online) and 1/16" ember-proof screening.
We chose EMBER Wildfire Defense Solutions because of their courtesy and obvious competence. We didn't aim to go with the lowest-cost company, but their bid was half that of the other contractor. They completed the work in half a day.
First, they installed new gable vents that defend our home with:
- Fine screening that does not allow blowing embers to enter, and
- A special material that closes the vent off when heated.
There are two ways to add the screens: replace the vents completely or cut Vulcan material to shape and screw it onto the original vent. We chose the second way because we did not want to take out the original vents and possibly damage our siding.
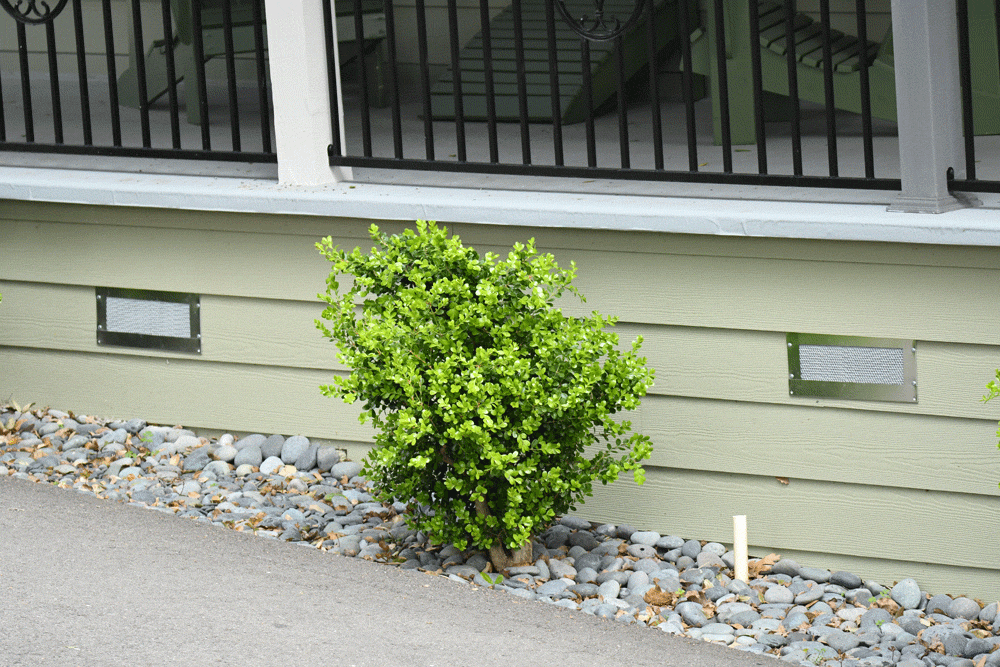
Then they installed the foundation vents. This was easy to do. We chose to remove the original vents and insert the standard-sized Vulcan Vents. In the photo on the right, you see that the trim around the vents has not been painted to match the siding -- a small job for a warm summer day.
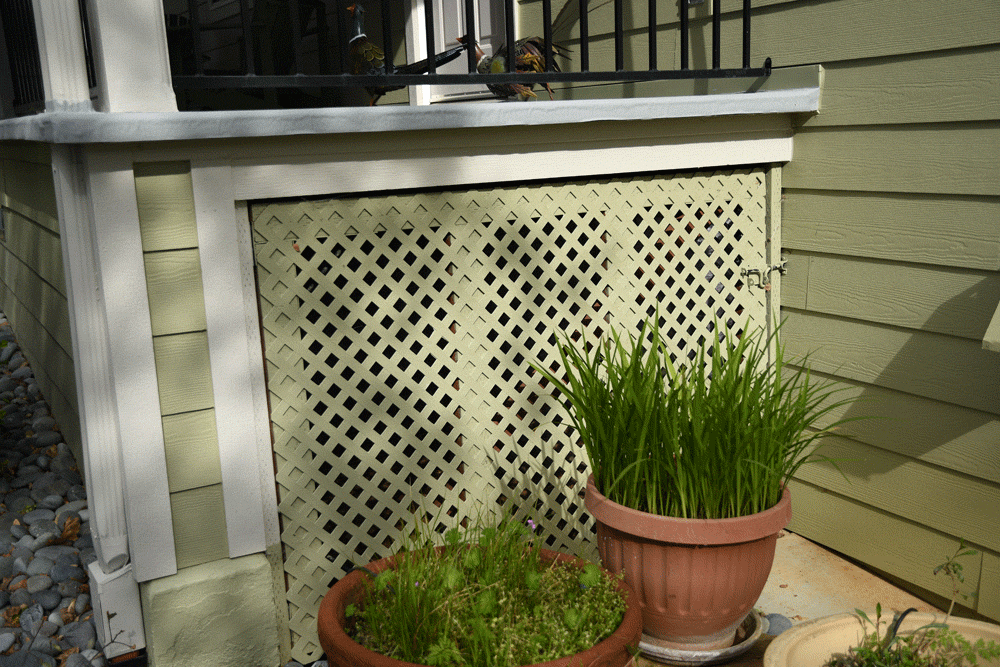
Next came a special situation. (Every home has something unusual.) In our case, the furnace exhaust exits under the front porch. We needed a lot of venting to meet code, so we left one side of the porch open with gridwork over it. But that provided an easy way for flying embers to get under the porch and ignite the house.
Our work crew brought a large piece of 1/16" screen to attach inside the grid work. 1/16" screening is fine enough to prevent flying embers from entering. The screening HAS to be made of metal. We placed the screening behind the grid to avoid changing the appearance of our porch.
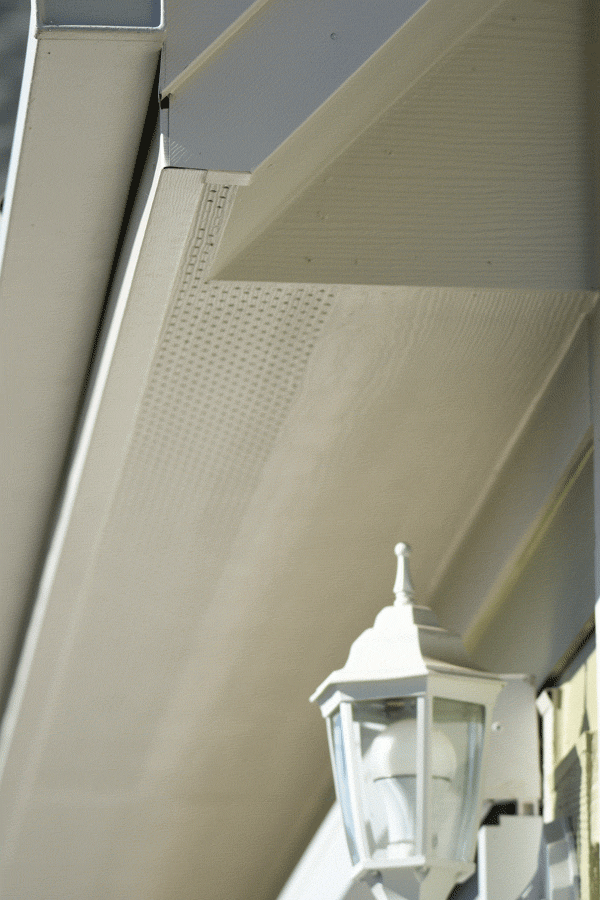
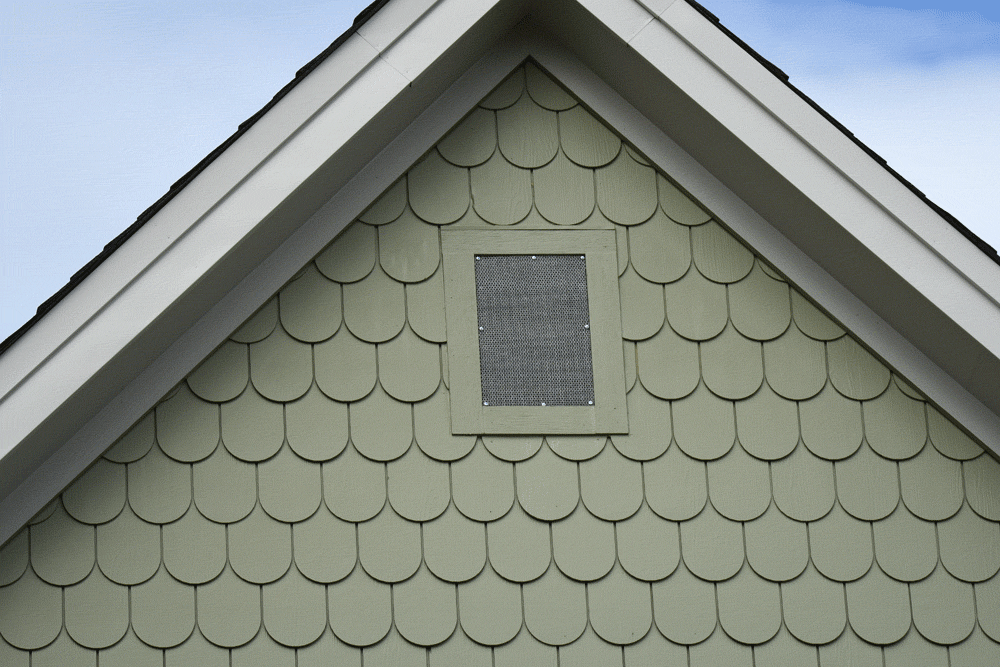
The next challenge was to ember-proof all the vents under the eaves. That turned out to be no problem at all. The installers pointed out that the problem was already solved.
We could have spent a bundle on Vulcan venting under the eaves, but the Hardie Board covering we put on the house a year ago closed the eaves in with cement board that had 1/8" holes all along the eaves -- not tight up against the house where embers might be trapped in the corners and forced through the small holes. You can see the detail in the photo on the right. The cement board in the soffit changed the looks of our house for the better and saved us money on ember-proofing.
The last venting problem turned out to be a surprise...the most dangerous of all...and easy to fix. When we had our new roof put on 10 years ago we installed ridge vents. Ridge vents allow super-heated air to escape from your attic out the top of the roof all along the ridge. But we discovered that our ridge vents were not ember-proof.
THIS IS SOMETHING YOU SHOULD CHECK OUT IF YOU HAVE RIDGE VENTS IN YOUR ROOF. Do not make the mistake of ASSUMING that the material in your ridge vent will keep out embers -- that is what we almost did.
One of the workers climbed up to check and brought me a photo showing the gap in the ridge venting material that would easily allow embers to flow into the attic.


Later, when Straight Line Construction showed up to replace the 10-year-old ridge vents, we laid one on the ground. Left photo shows the top of the ridge vent with the roofing shingles. Right photo shows the underside of the vent and how wide-open it is to embers.
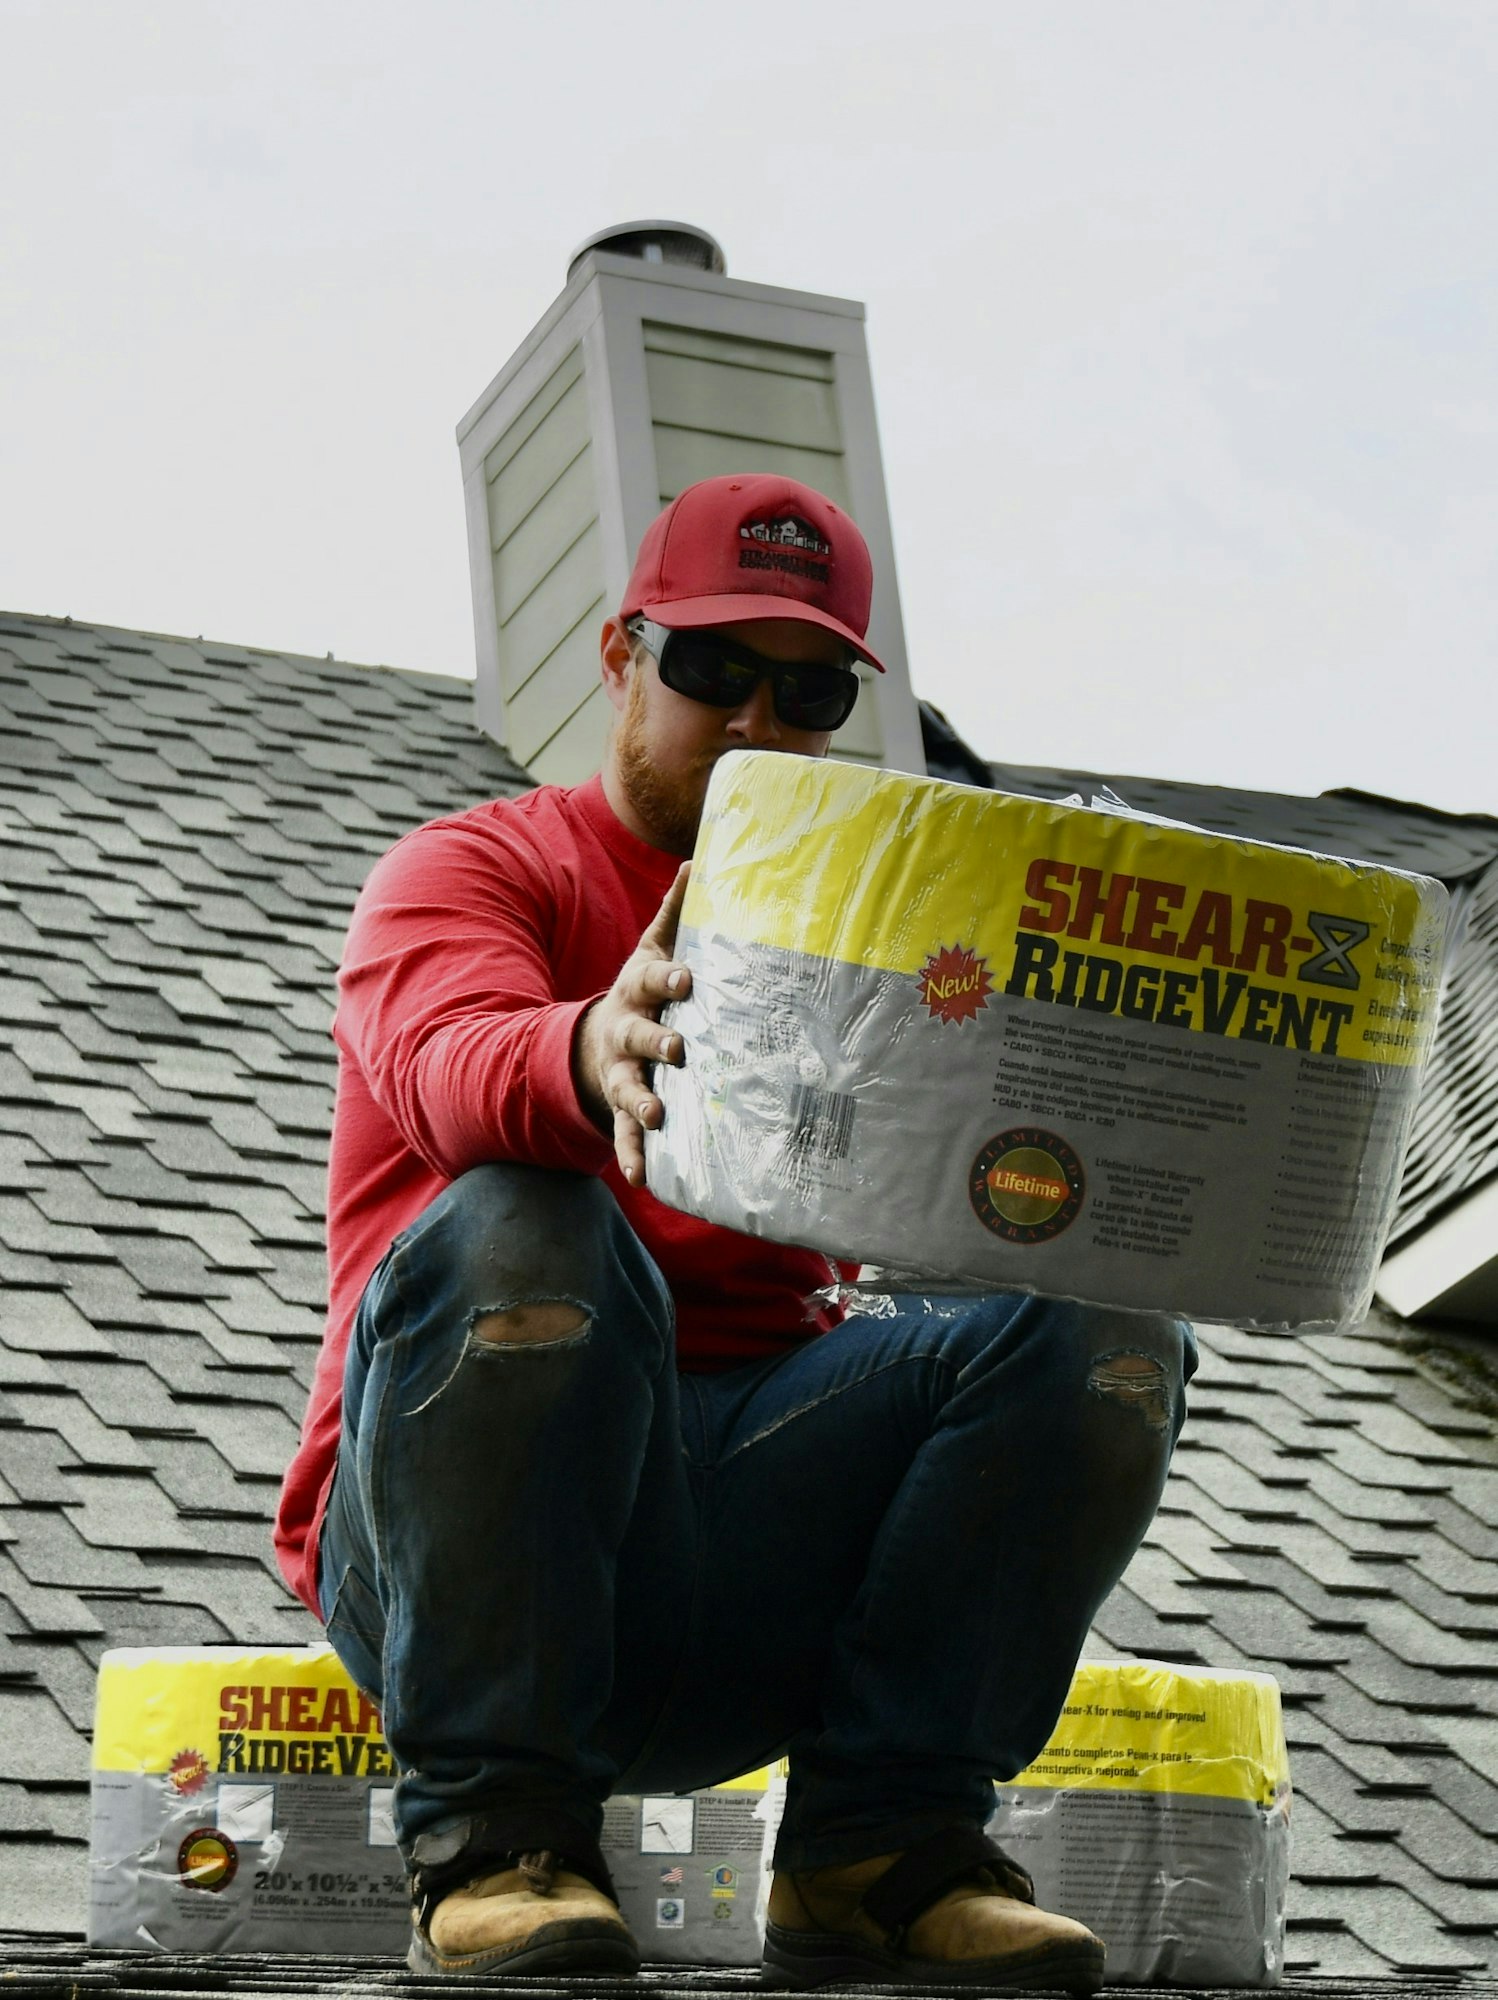
We searched the internet and found two companies that manufactured rolls of ridge venting material that was ember-proof.Our screen installers do not work on roofs, so we arranged for a roofing company to remove the old and install the new. The companies that produce the material are roofingdirect.com and Brandguard. The company we hired to install it was Straight Line Construction.
BONUS: EMBER Wildfire Defense Solutions carried out an examination of our home before they made their bid. That is when they discovered our roofing vents were not ember-proof. In addition, they pointed out that the bracing beams for our deck supports formed a "v" that would easily direct flying embers to lodge between them.
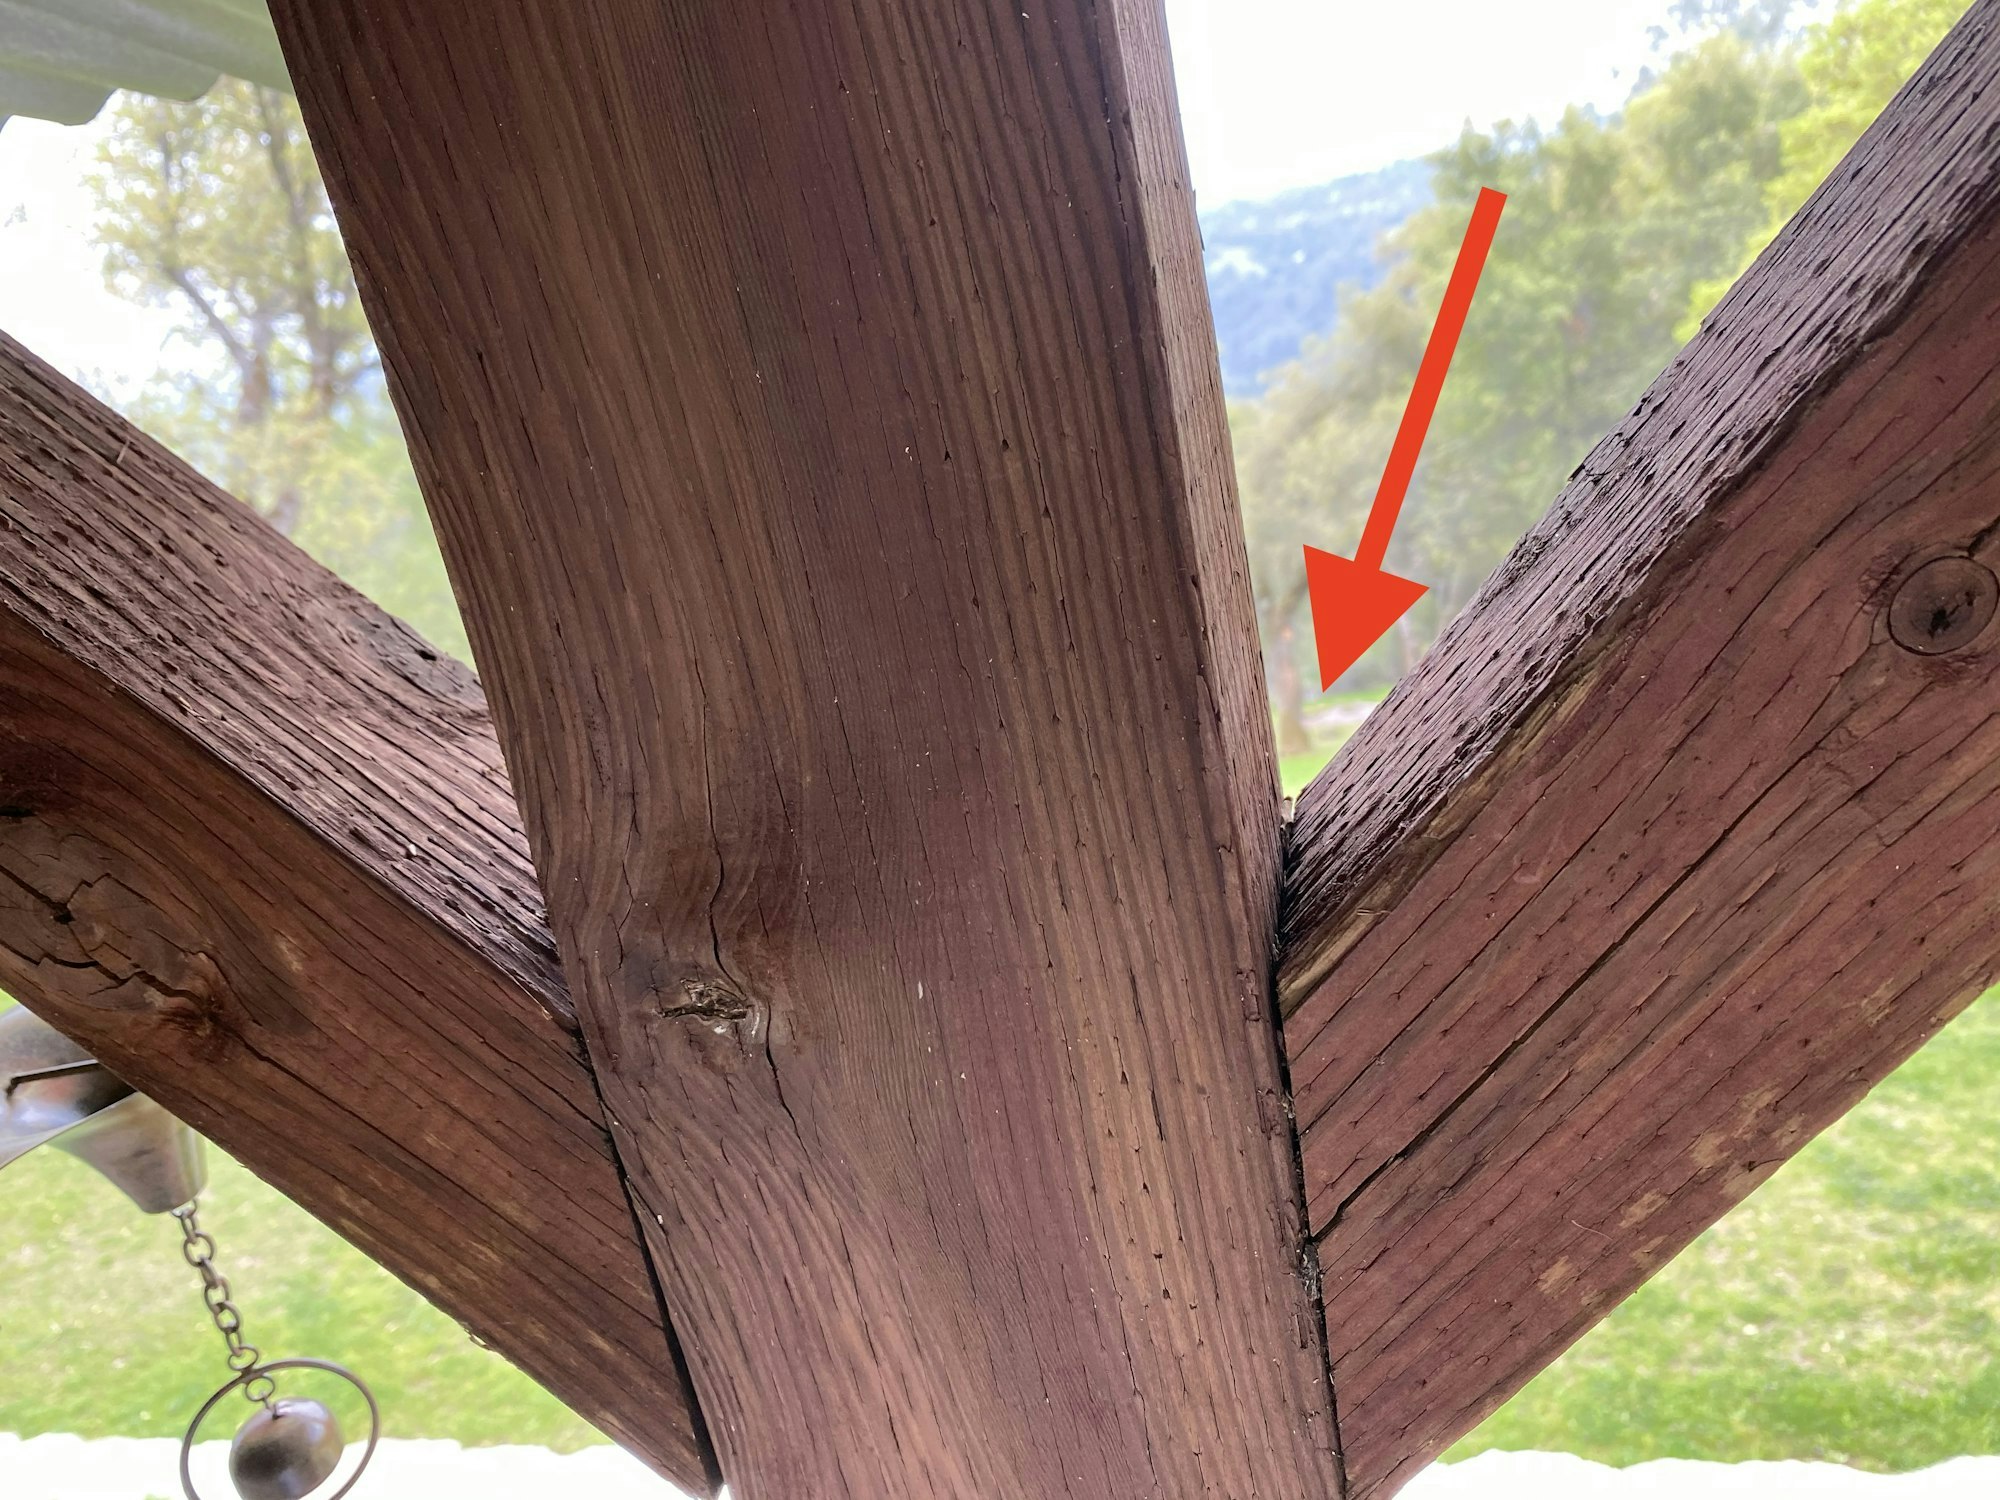
Normally, deck supports would not be ignited by flying embers, but if embers are captured in this way and lodged between the wood, they can ignite the deck structure. We were delighted to learn about this at a time when we could do something about it.
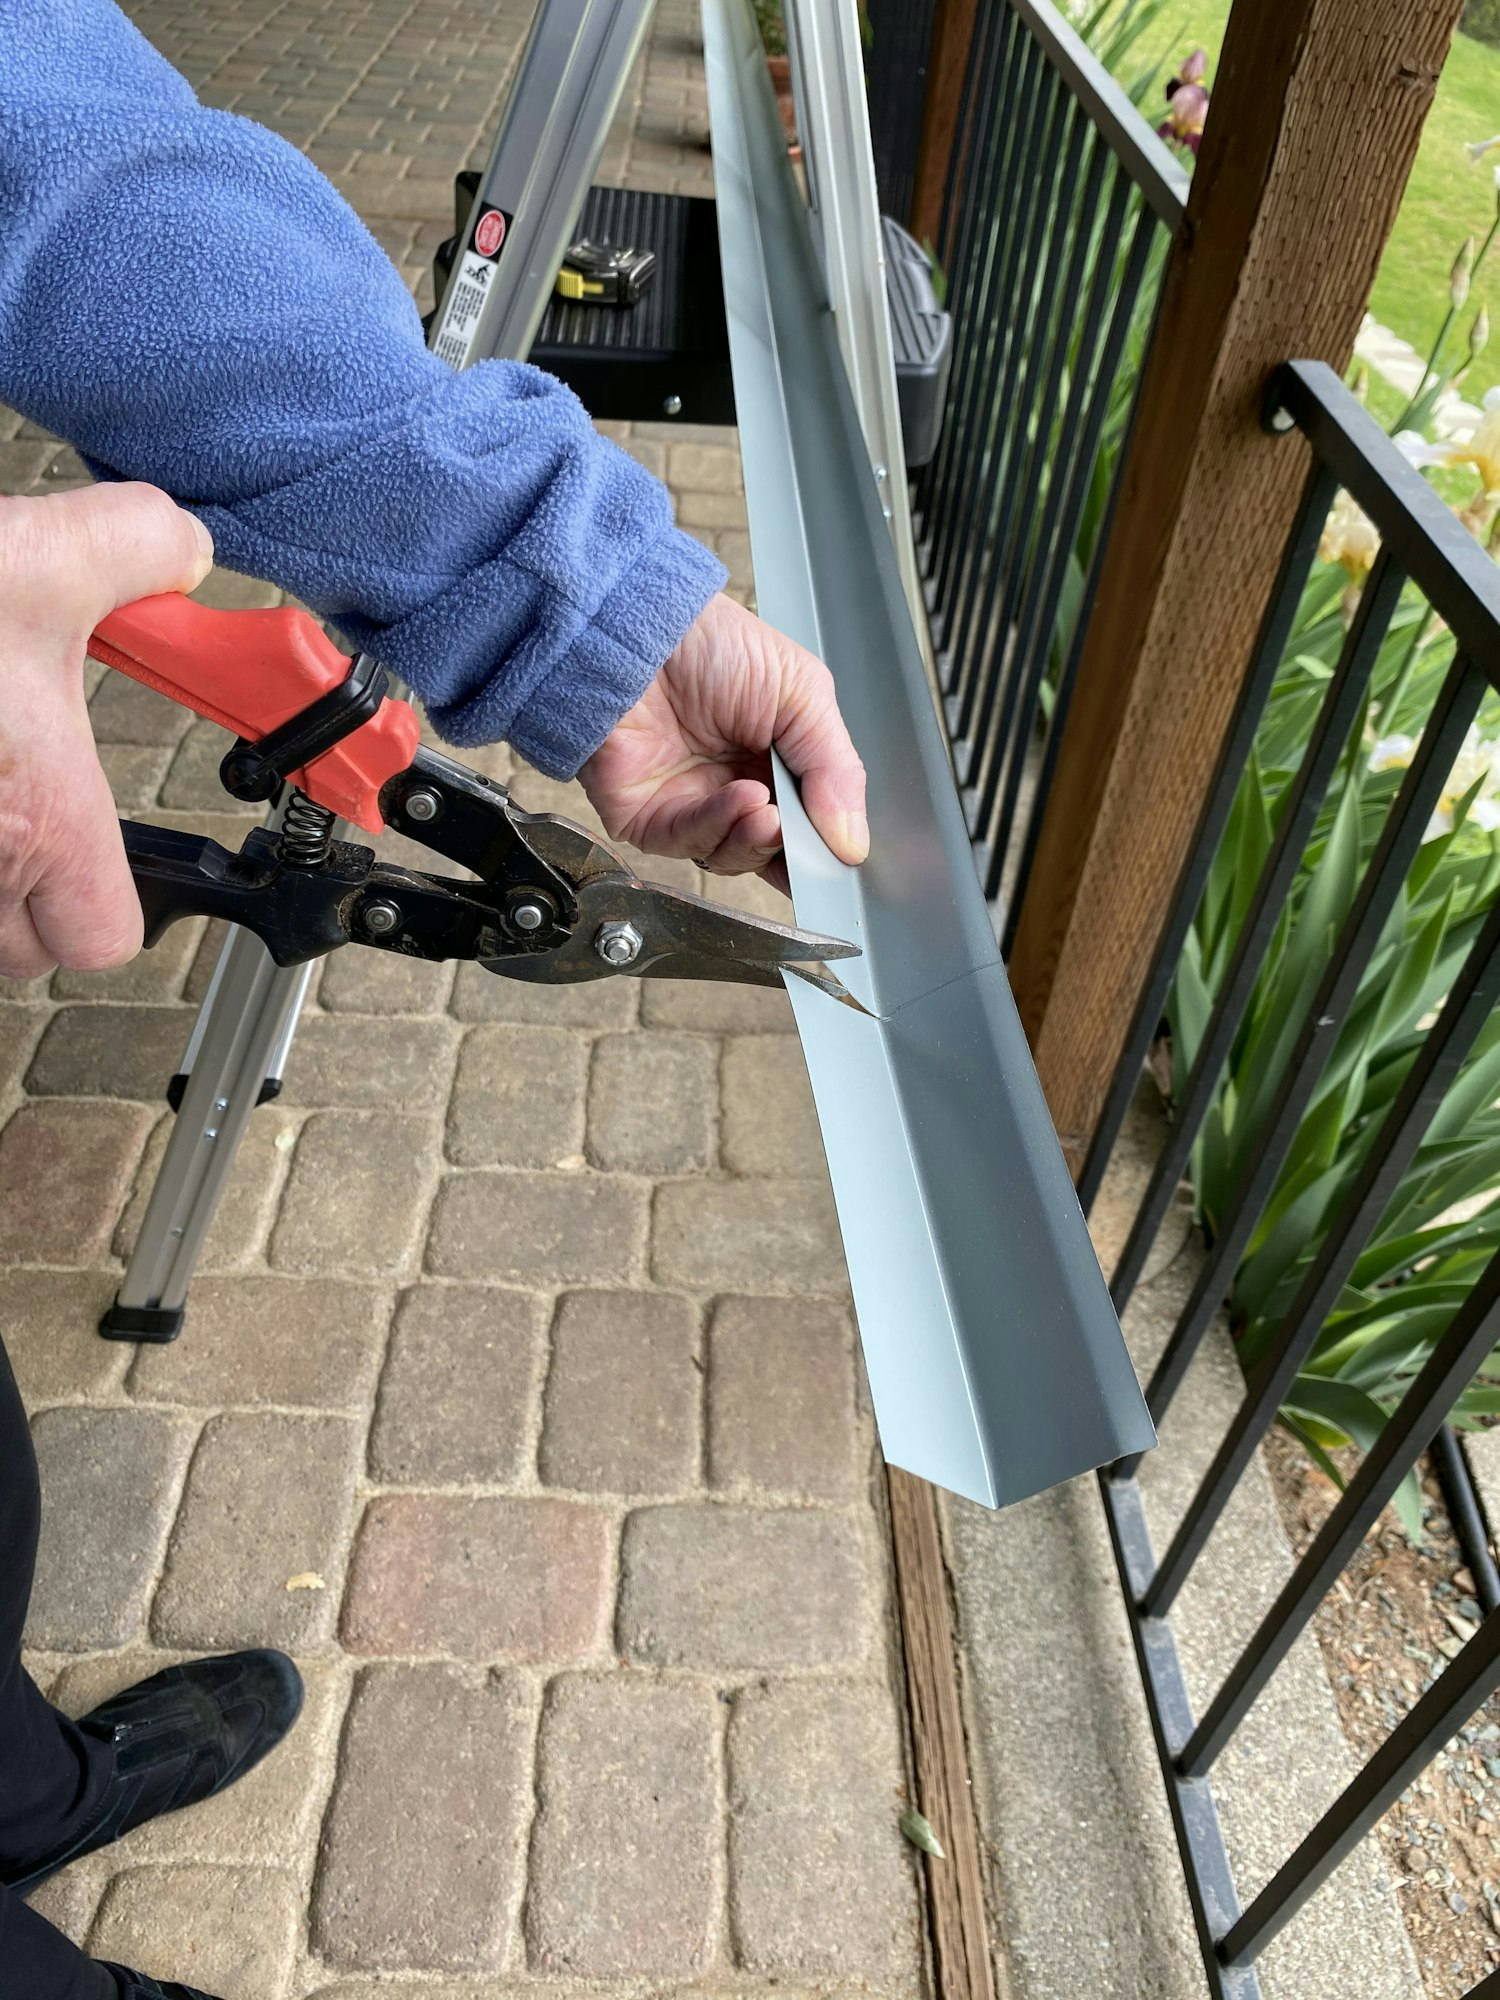
We devised an easy solution to this problem that was low-cost and do-it-yourself. We purchased aluminum roof edge flashing at Home Depot that already comes in a "v" shape. In the photo on the right, Lara measured and cut the flashing exactly 5.5" long with a tin snip. . .
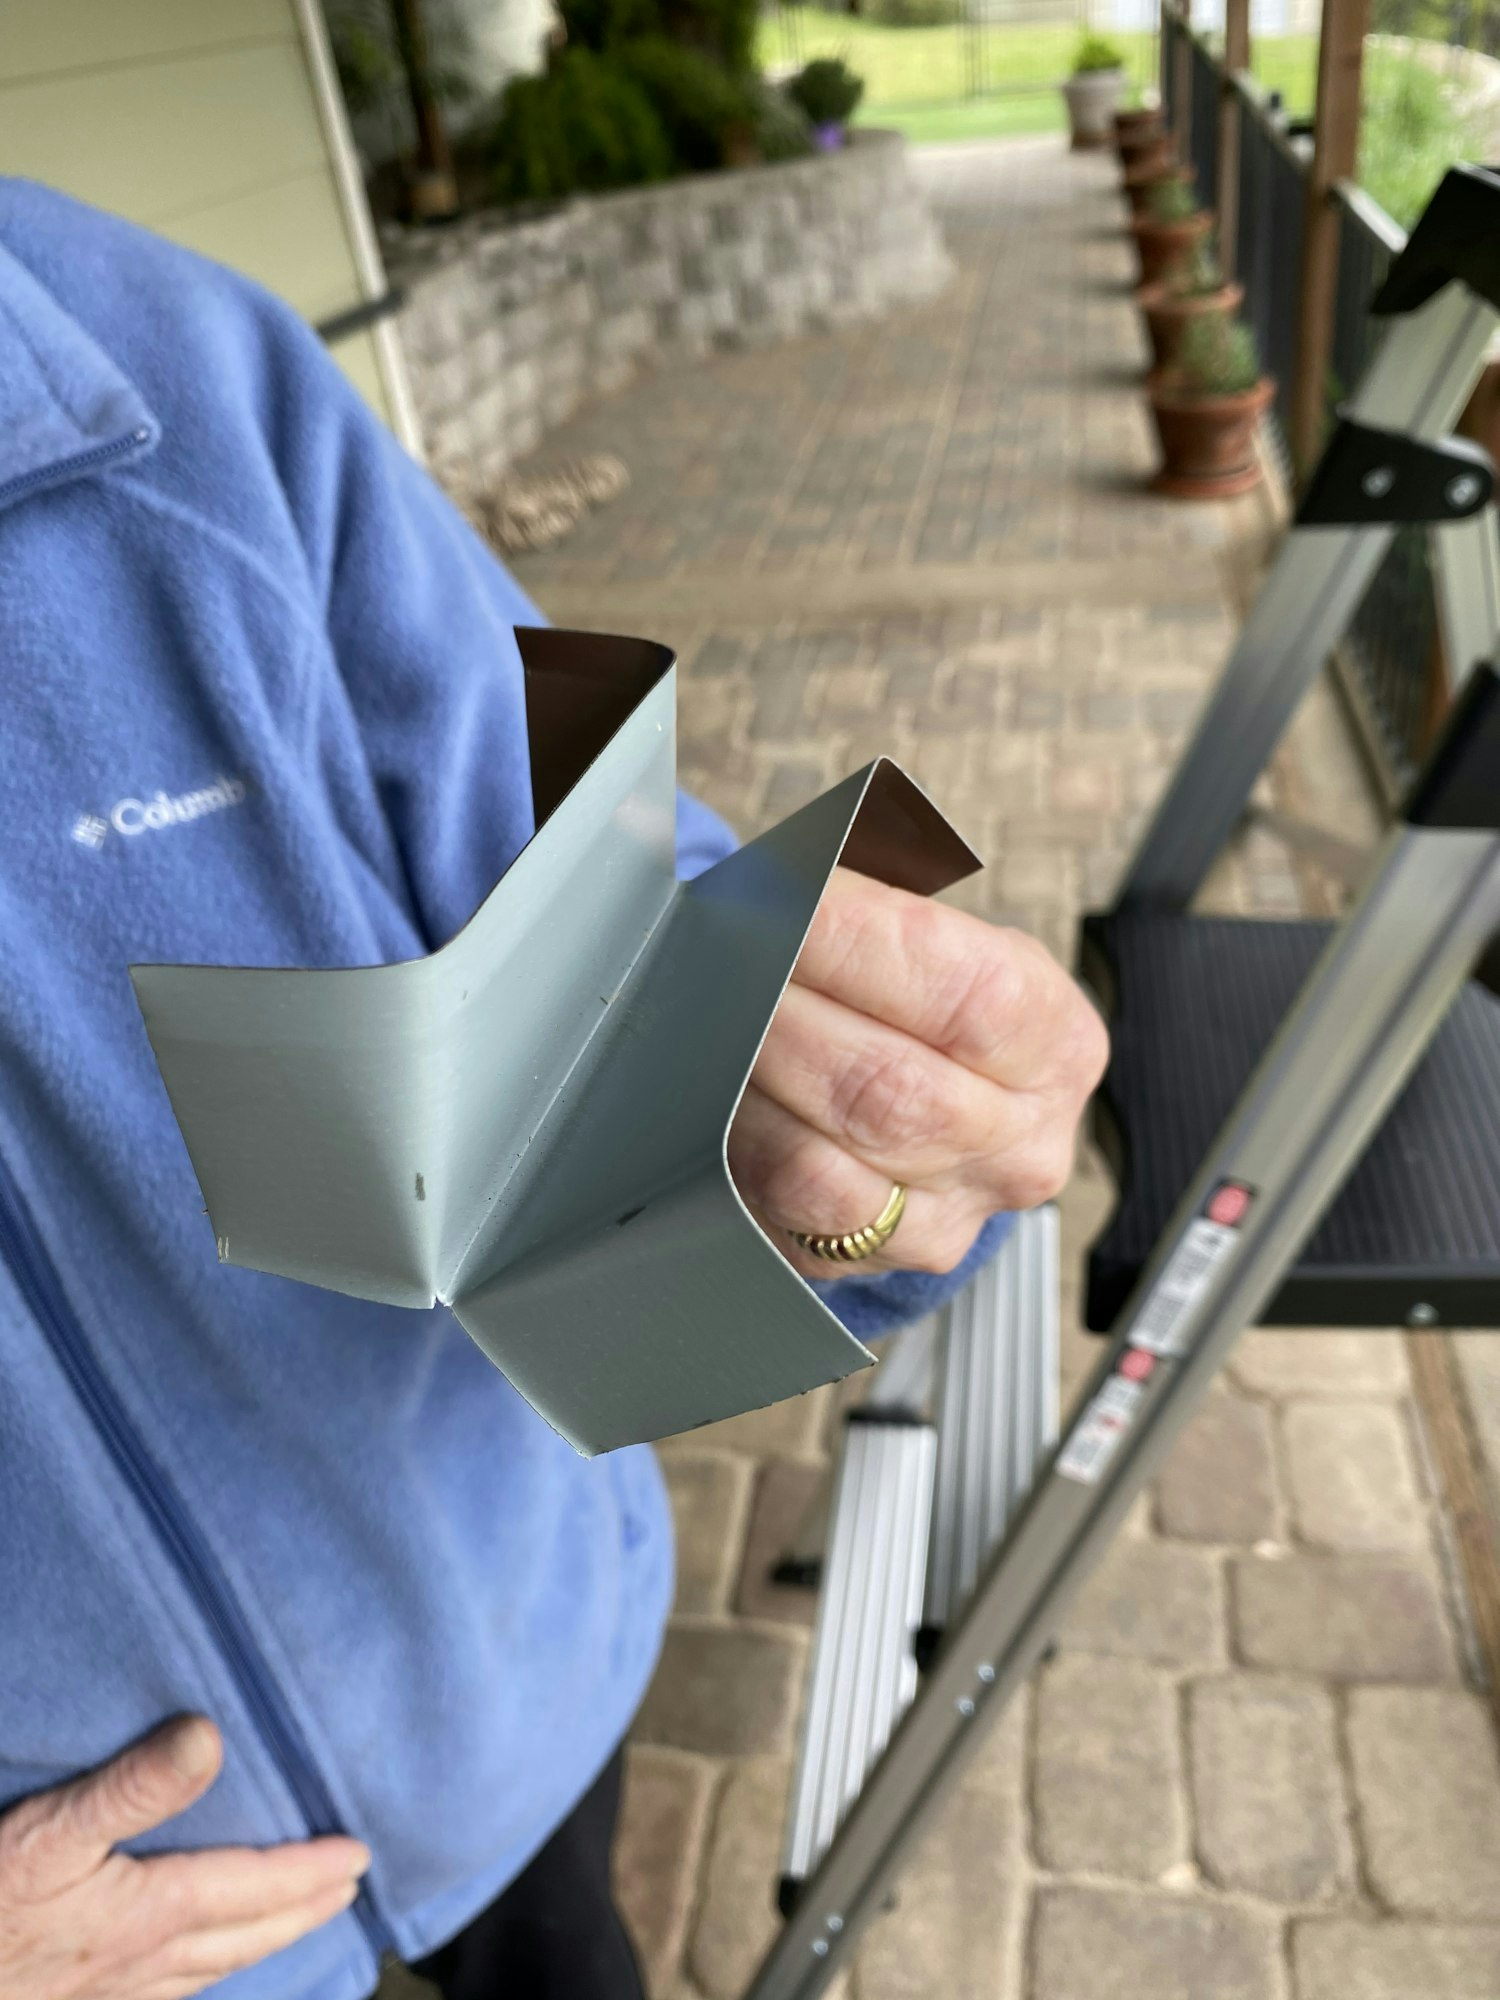
then she cut 1" down the folded center on each end and bent it to the shape we needed.

Once inserted, the shapes held firm and needed no nails to hold them in place. Next we will paint the aluminum pieces to match the posts.
3. Remove Flammables from Roof and Side of House
We've learned that, in most cases, houses do not ignite from the high temperature flames of a wildfire. They ignite from the low temperature burning of leaves, pine needles, and other flammables close to the house that are themselves ignited by blowing embers.
We don't have a problem with leaves gathering on our roof because it is steep. To keep leaves from gathering in the rain gutters, we had Byer's Leaf Guard gutters installed several years ago. A side benefit is that you never have to clean gutters again!
When we installed Byer's Leaf Guard, they were almost the only rain gutters on the market that effectively kept leaves and pine needles from piling up in the gutters -- that was about 15 years ago. They still work today, but there are many more leaf guards products on the market today. My only suggestion is that you not buy a leaf guard to go on top of your existing gutters if they are made of plastic -- plastic shrinks and decays rapidly in the sunlight. A metal leaf guard will be a better bargain over time.
Another article appears on this website that shows the homeowners installing a different leaf guard that appears to be working very well -- here is a link to it.
Previously, we mentioned that we removed or trimmed all vegetation within the first 5 feet of our home, but we wanted to do more to make this critical area so close to the house more fire resistant. We had seen new homes being built that had rock wall for at least the first 3 feet on the outside walls -- but our home was 25-years old -- it was too late for that. We decided on a low cost, attractive alternative -- paving stones laid over compacted sand to make quick, inexpensive patios. We chose the Sierra Mix of colors and 2" thick bricks.
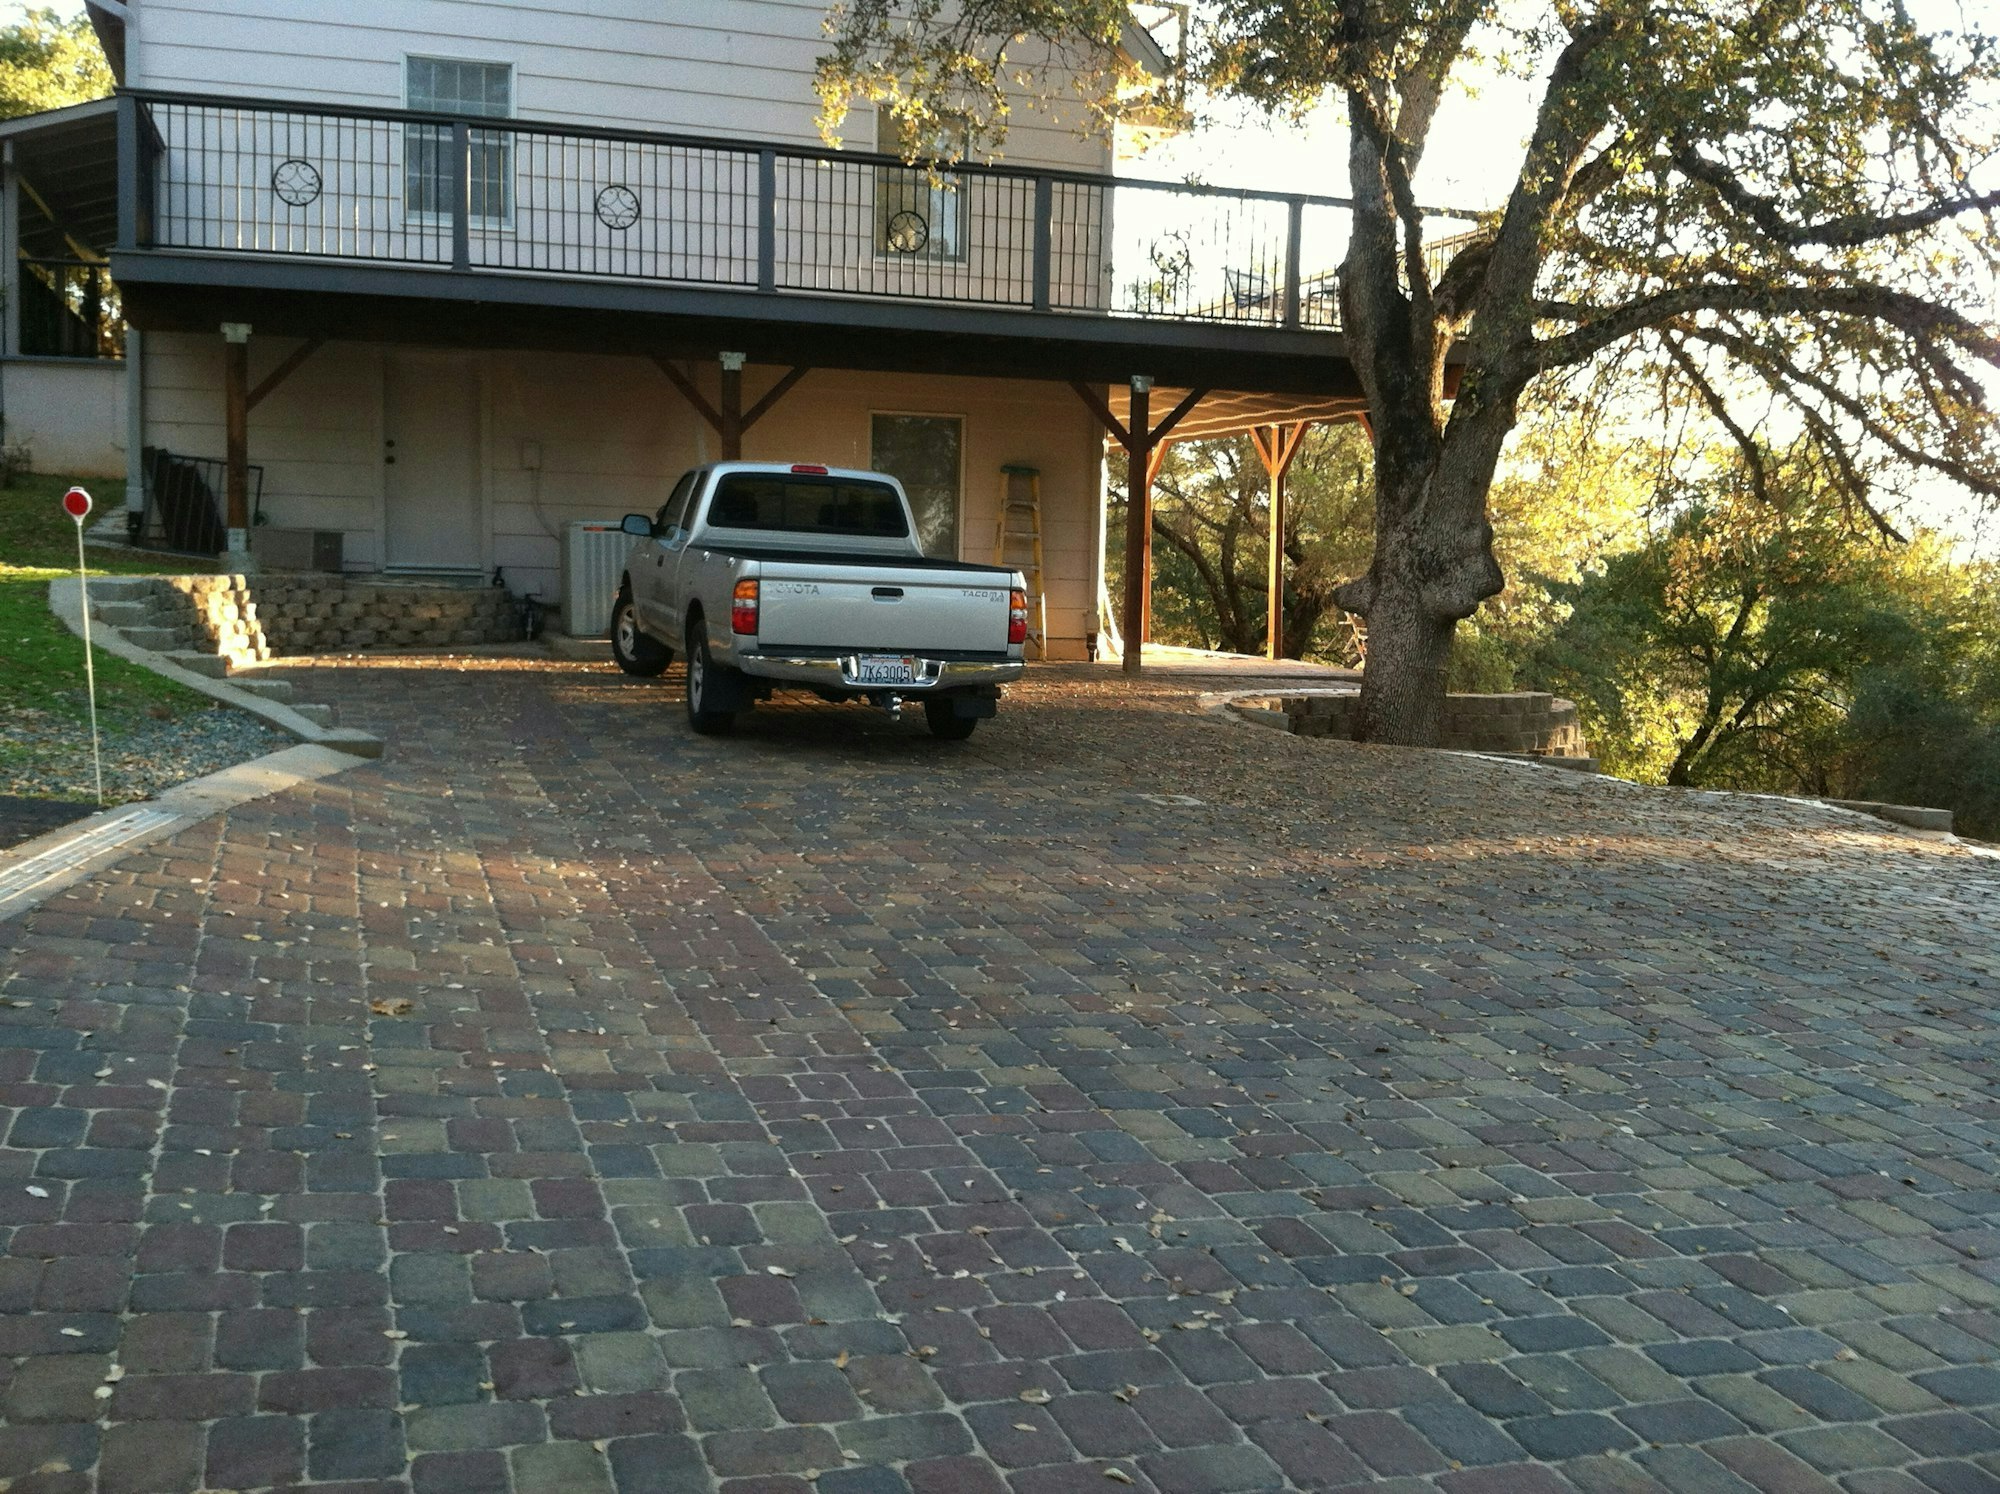
Much of the patio work was DIY. We laid down wooden forms to guide the leveling of the ground, added sand, leveled and compacted the sand, and then we laid the paving stones in a pattern that appealed to us. Finally we swept the stones with a fine sand that has polyester powder in it (purchased from Home Depot), sprinkled the stones gently with water, and when it dried the sand was fixed into place and sealed the cracks between the stones. In this way, we gave ouselves a patio on one side of the house and a parking area on the other, improving our fire resilience.
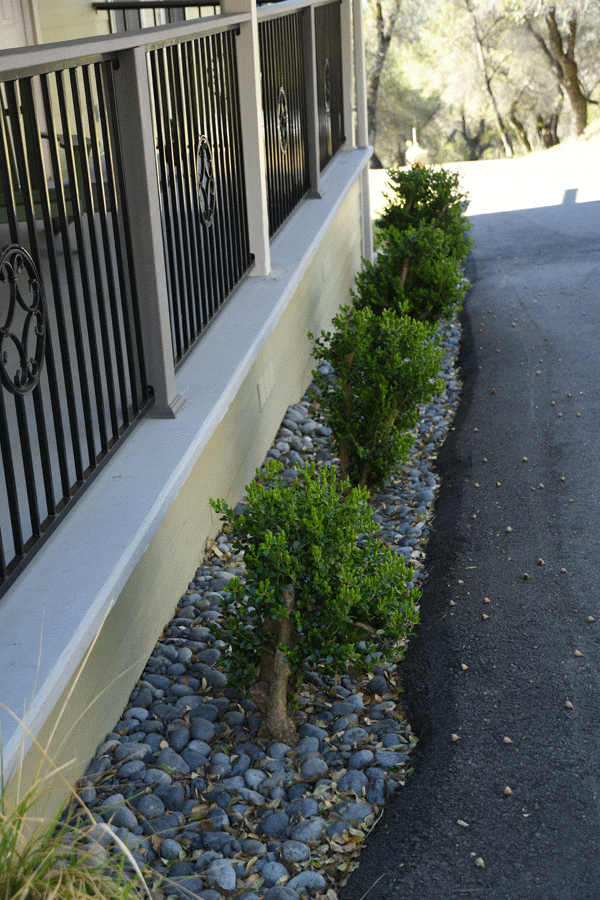
On a third side of the house we beefed-up the fire resistance with beach pebbles you can get in large plastic bags at Acer Landscape Materials in Shingle Springs. But we will have to keep leaves blown off the pebbles and dead branches trimmed from the box wood we have growing among the pebbles.
The fourth side of our house had a tall, concrete foundation and a level, grass lawn -- it needed no further work.